The first camera in a film format that is still rolling.
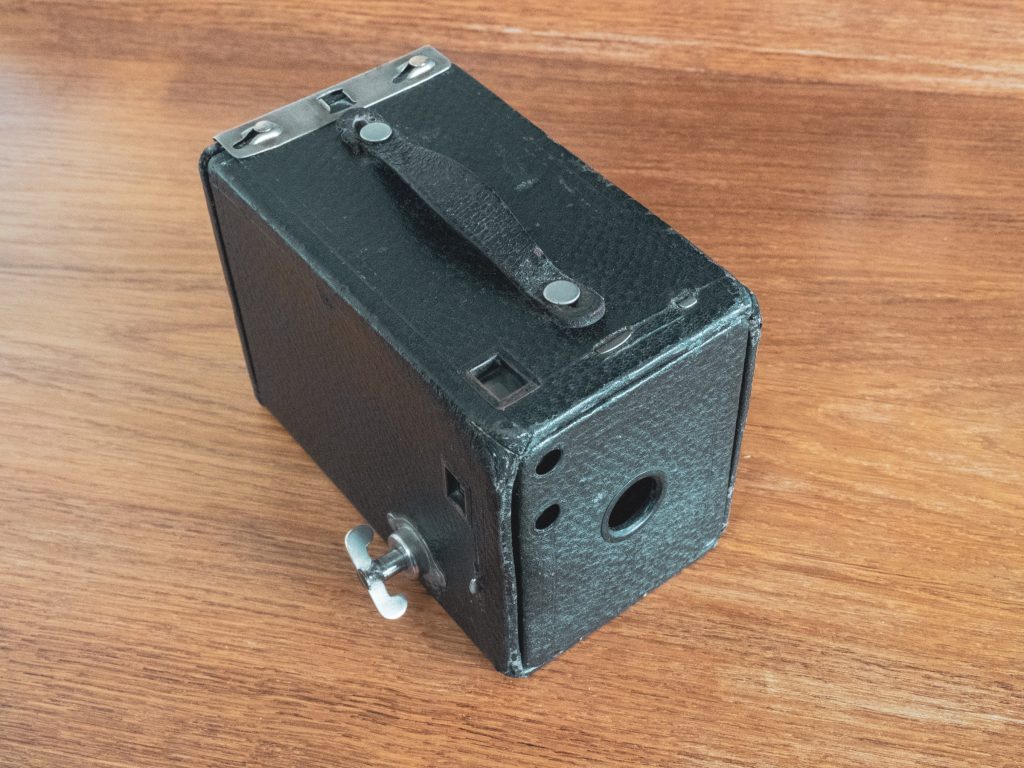
To run a vintage camera site dedicated to landmark models and not have a decent smattering of Kodaks would be to invite mockery, so here is the second Kodak camera to make an appearance on Retro Film Camera. This is also a departure from the 35mm format for this site, which has been the focus of all previous posts.
Why is the Kodak No.2 Brownie a Landmark Camera?
1: The world’s first camera to use 120 film.
2: One of the most successful camera designs of all time.
3: It brought the joy of photography to millions.
The User Experience
The Look
The Kodak No.2 Brownie was the first camera made for the 120 format, the dominant medium format still used today and still produced in volume by Kodak Alaris and others. The No.2, as the name strongly suggests, was the follow up camera to the legendary original $1 Brownie, which due to its low cost brought the pleasure of photography to more people. If the original was the ignition, then the second model was lift of for photography as a popular pastime. Intended for children, millions of the second model were made and sold from 1901 into the 1930’s. In 1924, the No.2 received a new metal body to replace the leatherette clad cardboard and wood body that had sufficed for 23 years.
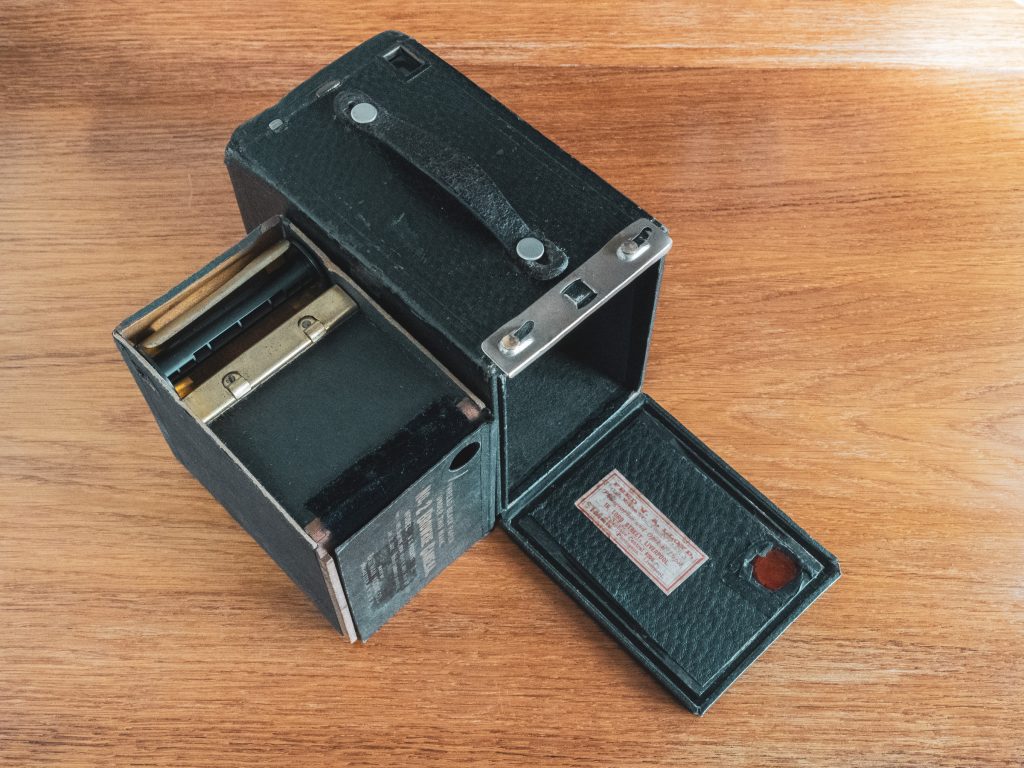
The No.2 saw many minor changes in all that time, but the basic principle of a simple and reliable camera with one shutter speed and 3 apertures remained throughout. My No.2 is a fairly early Model B, made between 1904 and 1907. It has survived reasonably well. The box has lost a bit of shape, which made pulling the inner box out a bit of a challenge, as it was pretty snugly fitted inside. I also had to use a bit of wood glue to fix a wood join and reapply some loose felt that the film glides over when being advanced.
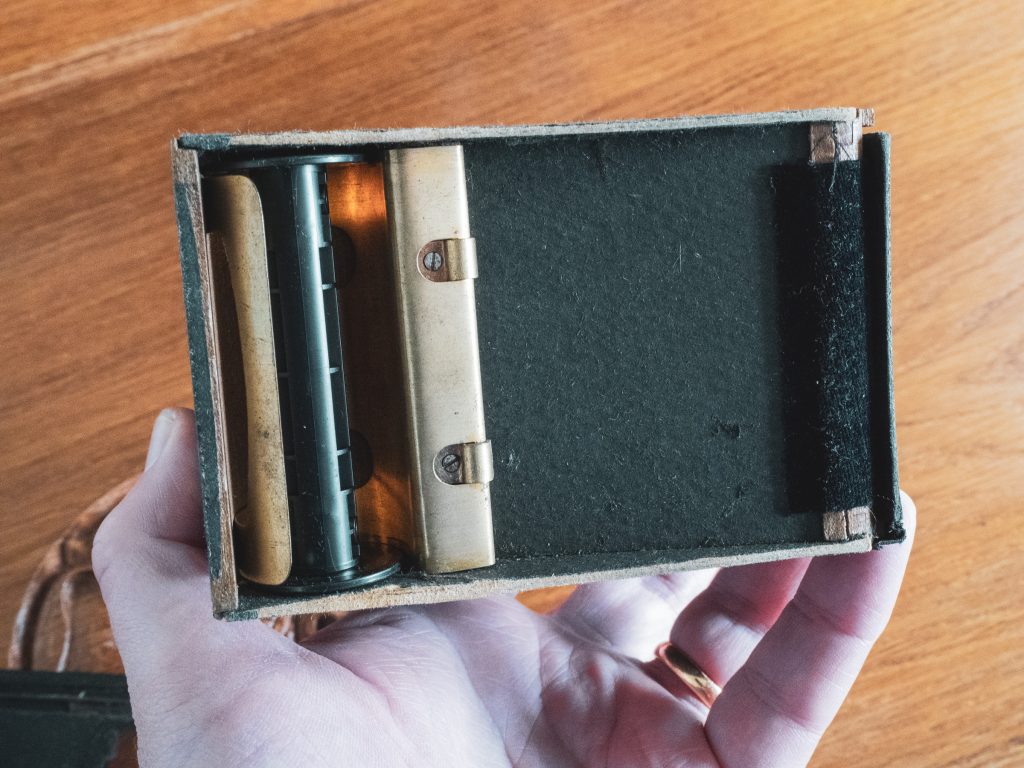
The good news is it is in working order and I have ran a couple of rolls of film through this old timer.
The Feel
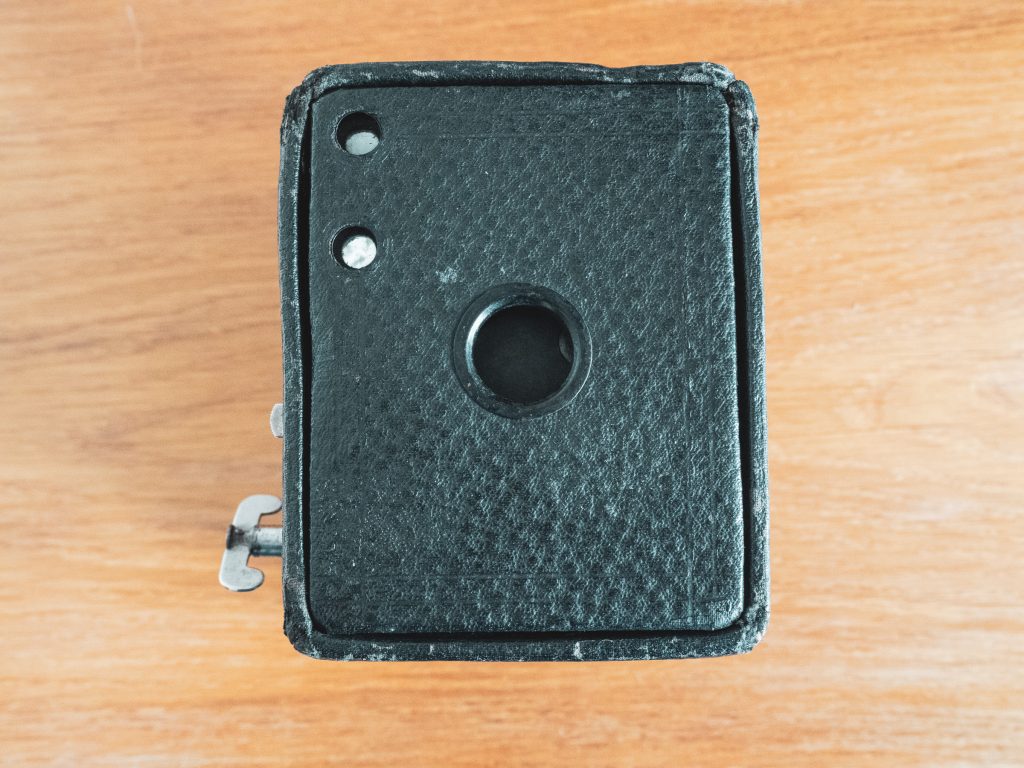
Using a Brownie, you realise the genius of George Eastman and his early camera designer Frank Brownell. This lightweight and portable but solid feeling leatherette covered box removed the chemistry and complexity which had previous barred entry to photography as a hobby for many. The neo-point-and-shoot Brownie is pure fun. The only decision the photographer has to make is aperture (3 options) and composition via one of two small reflecting finders for vertical or horizontal shots.
In Use
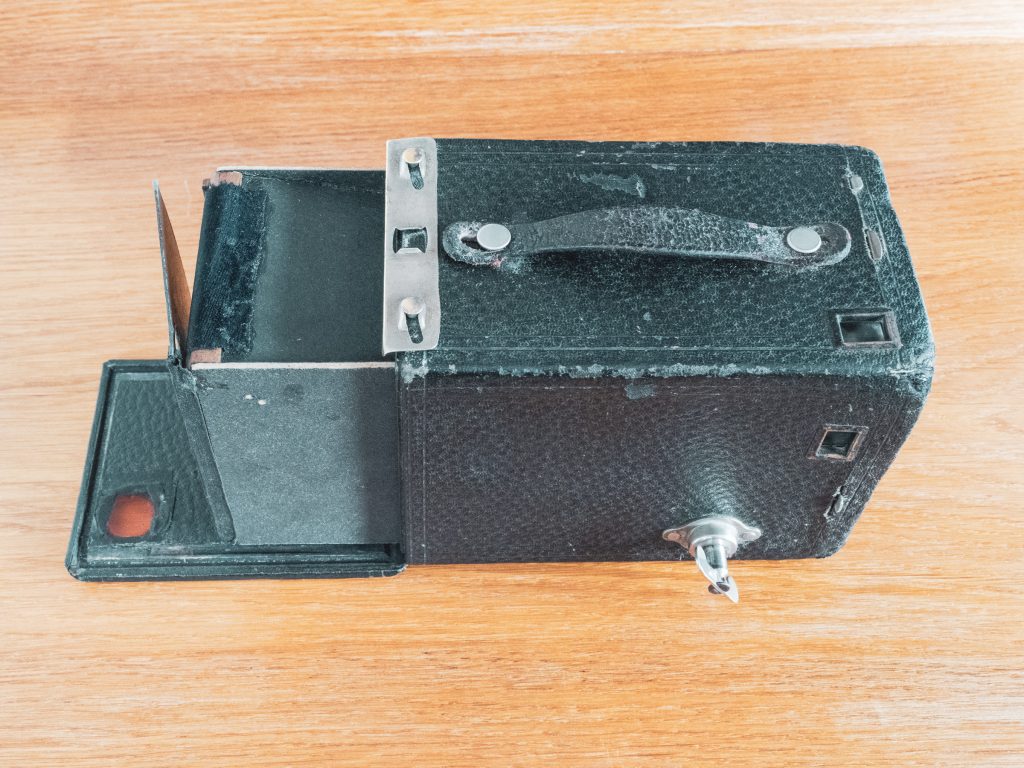
The first important act when loading the Brownie with film is to remember to gently ease out the winding key to detach it from the inner box and spool, so that the inner can be removed for film loading.
My Brownie isn’t quite square any more. Call it old age. Consequently, the inner film holder has to be gently eased out of the slightly warped outer box.
Loading film
Loading film is very straight forward. You place the fresh film roll into the bottom film recess at the back of the camera and draw the paper across the top of the box to the front and fix the paper leader into the empty spool at the front of the camera. Just have the mask open when drawing the paper over the back so it can be closed over the film.
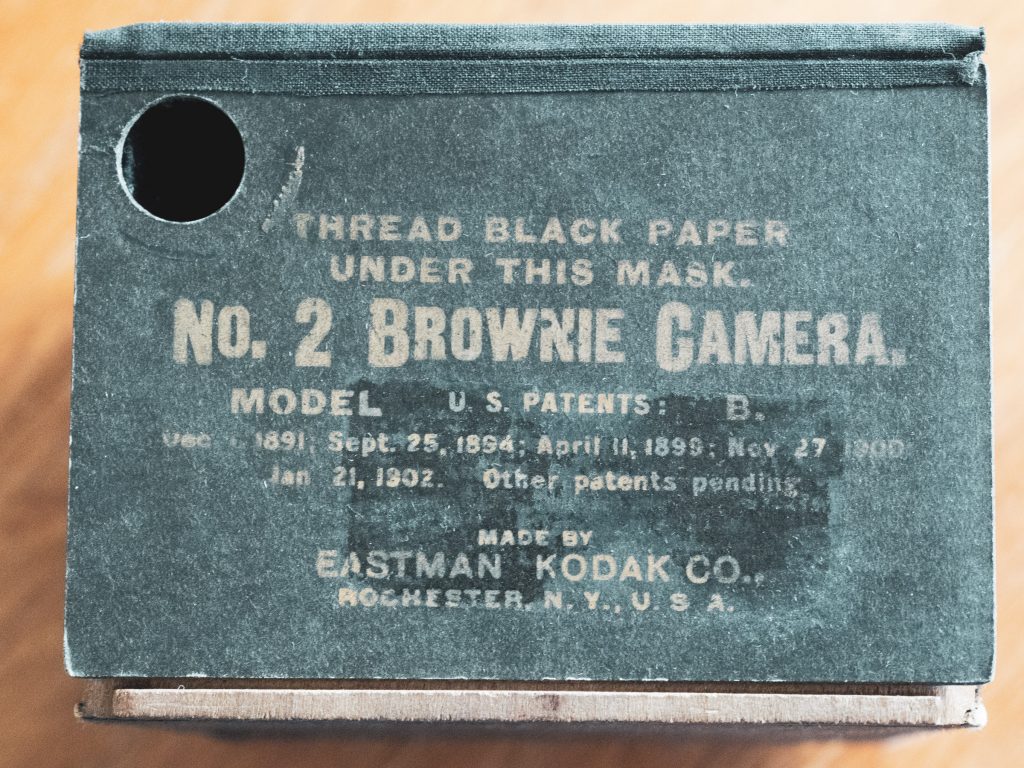
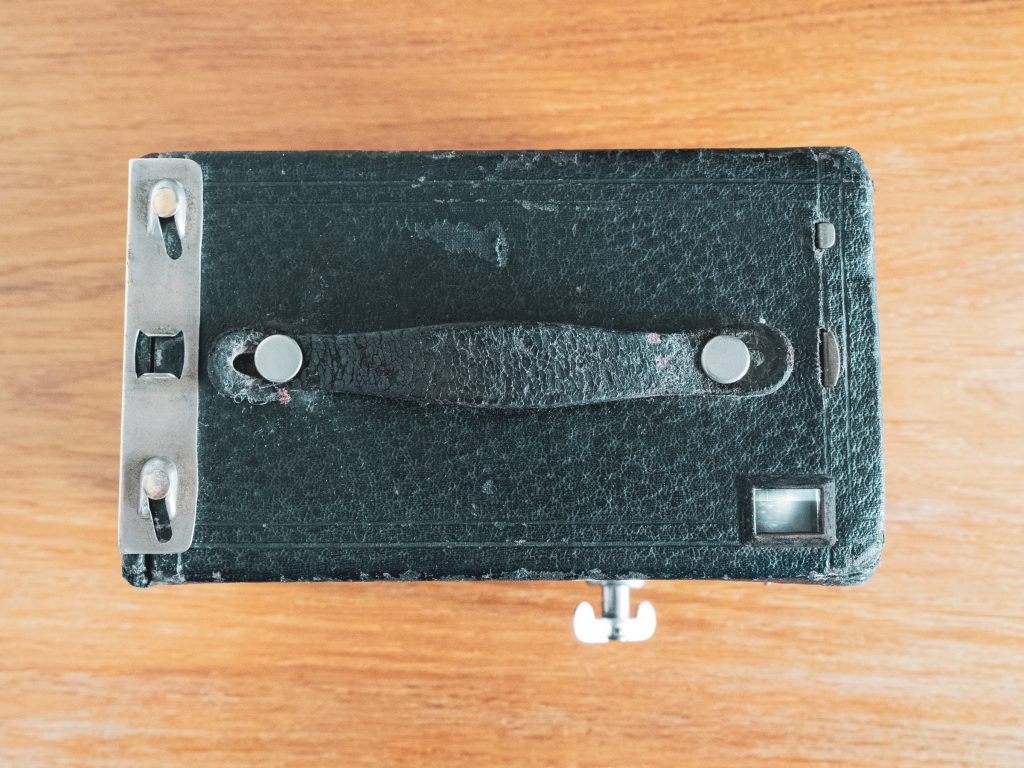
When the film is safely on the empty spool, ease the loaded inner box fully back into the outer, push in the winding key and slide the door lock across the back of the camera to secure it. Finally, wind on the film until you can see a number 1 appear in the red circular window at the back of the camera. You are ready to make images!
Framing
I found framing to be the trickiest part of using the Brownie. The viewfinders are tiny and reflect a fair bit of light. Shading them certainly helps you to see what you are pointing at. The image is also reversed to add to the challenge of waist level composing.

After framing aperture selection is made by drawing out or pushing down a metal tab found front top middle of the camera body. You have a choice of f/11, f/16 or f/22. You have no choice of shutter speed. It is around 1/45th second, and tripping the shutter is done by a slider on the right side of the camera near the front. If you want a longer exposure, pulling a second metal tab front top left engages bulb mode. I have not tried this.
About the shutter
One thing to note about the shutter is that it is of the rotary type. The shutter is first primed or reset by pulling the lever upwards. A second pull upwards operates the shutter. The lever has now travelled up to the top of the slider. Pushing it down releases the shutter one more time and returns the lever to the bottom. The shutter then has to be primed again by pulling upwards on the lever.
And that’s it. Just remember to advance the film between frames. You will get 8 6×9 exposures of surprisingly decent quality from the doublet lens.
Photographs taken with the Kodak No.2 Brownie
I managed 5 exposures from a possible 8 at a day out in Richmond. These were taken with Fomapan 100 and developed in XTOL. You can see how I struggled with framing using the small viewfinders. The final image was supposed to be a photo of the River Swale! Despite the challenge, there is something joyful about using such an old and primitive device for image making. It takes you closer to the magic essence of photography; craft, science and history wrapped into one venerable little box.


Latest comments
Christopher Pattison
"What a lovely gift from your dad Alicia. "
Alicia Smith
"My dad gave me one when I was a teenager back in the ..."
Christopher Pattison
"Thanks for your early camera owning history Manou. I can see the Kowa ..."
Christopher Pattison
"You are welcome. "
Christopher Pattison
"Yes, Andrew. I bought a second one and that stiffed too. Such a ..."
Andrew Flannigan
"Unfortunately, the Prakticamat, as with all the Nova derived Prakticas, was too often ..."